Introduction
About these instructions: The following QR-code label instructions are specifically for generating labels that Field Book users can use for plot navigation. Instructions and best practices for other QR-code use cases are in development.
Annotation Key
More information
Recommendation, advice, note, or tip
Cautionary note
Requirement
How to generate QR-code labels for plot navigation in Field Book
Step 1. Download plot layout from BreedBase
Login to your program’s instance of BreedBase.
Under “Search” in the top tool bar, select “Field Trials” (Fig. 1.1)
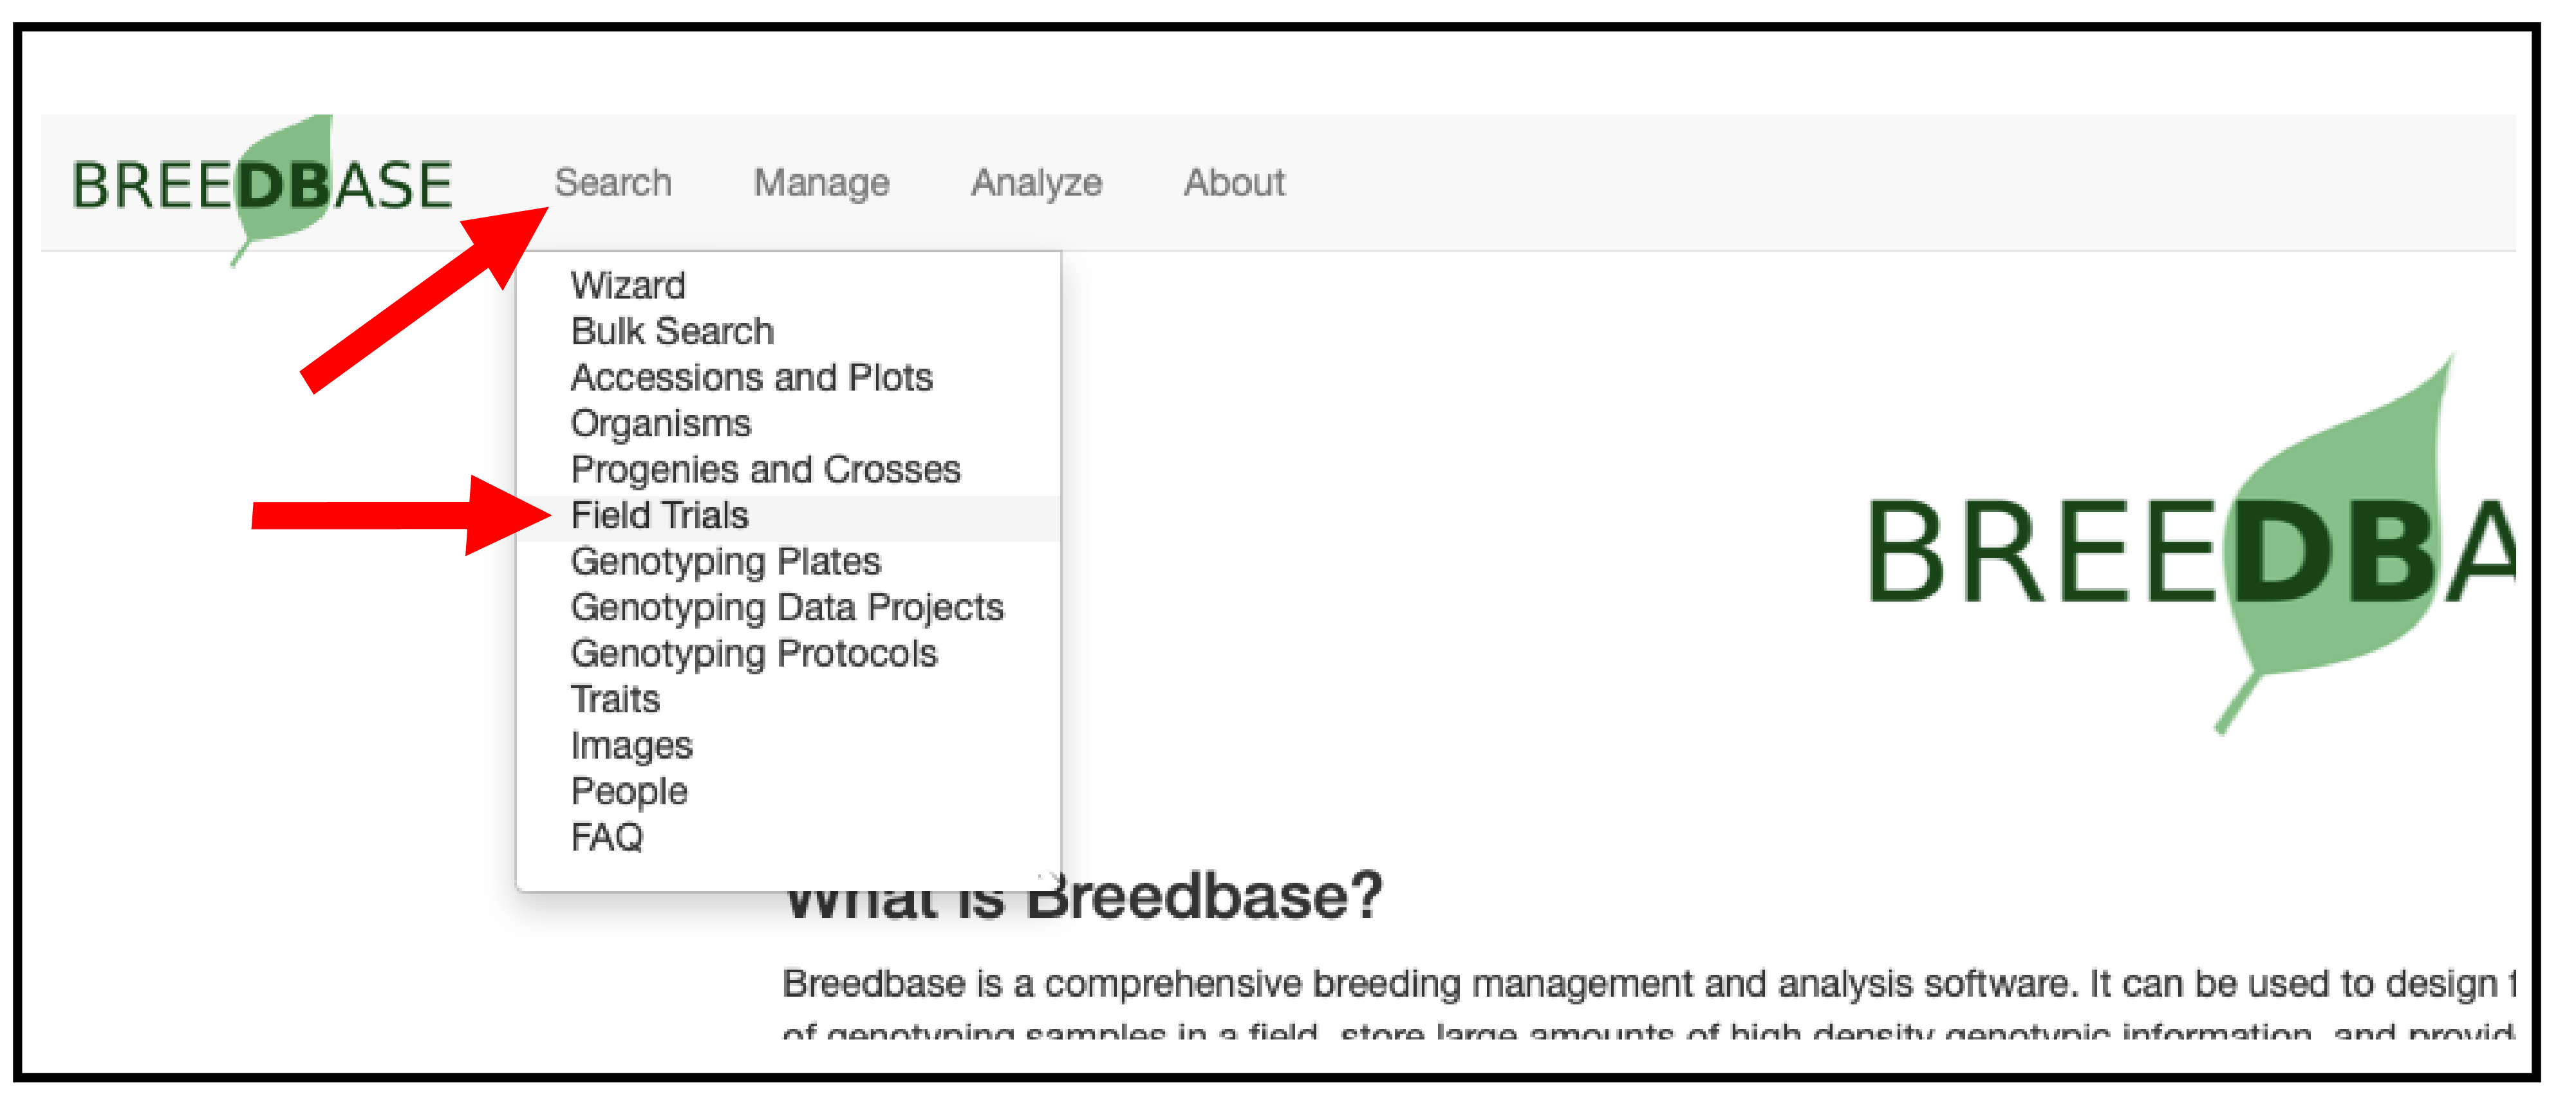
In the Search bar (upper right-hand corner), type in the name of the trial for which you wish to create labels.
Your trial should appear.
Select “
Download Plot Layout” (Fig. 1.2).
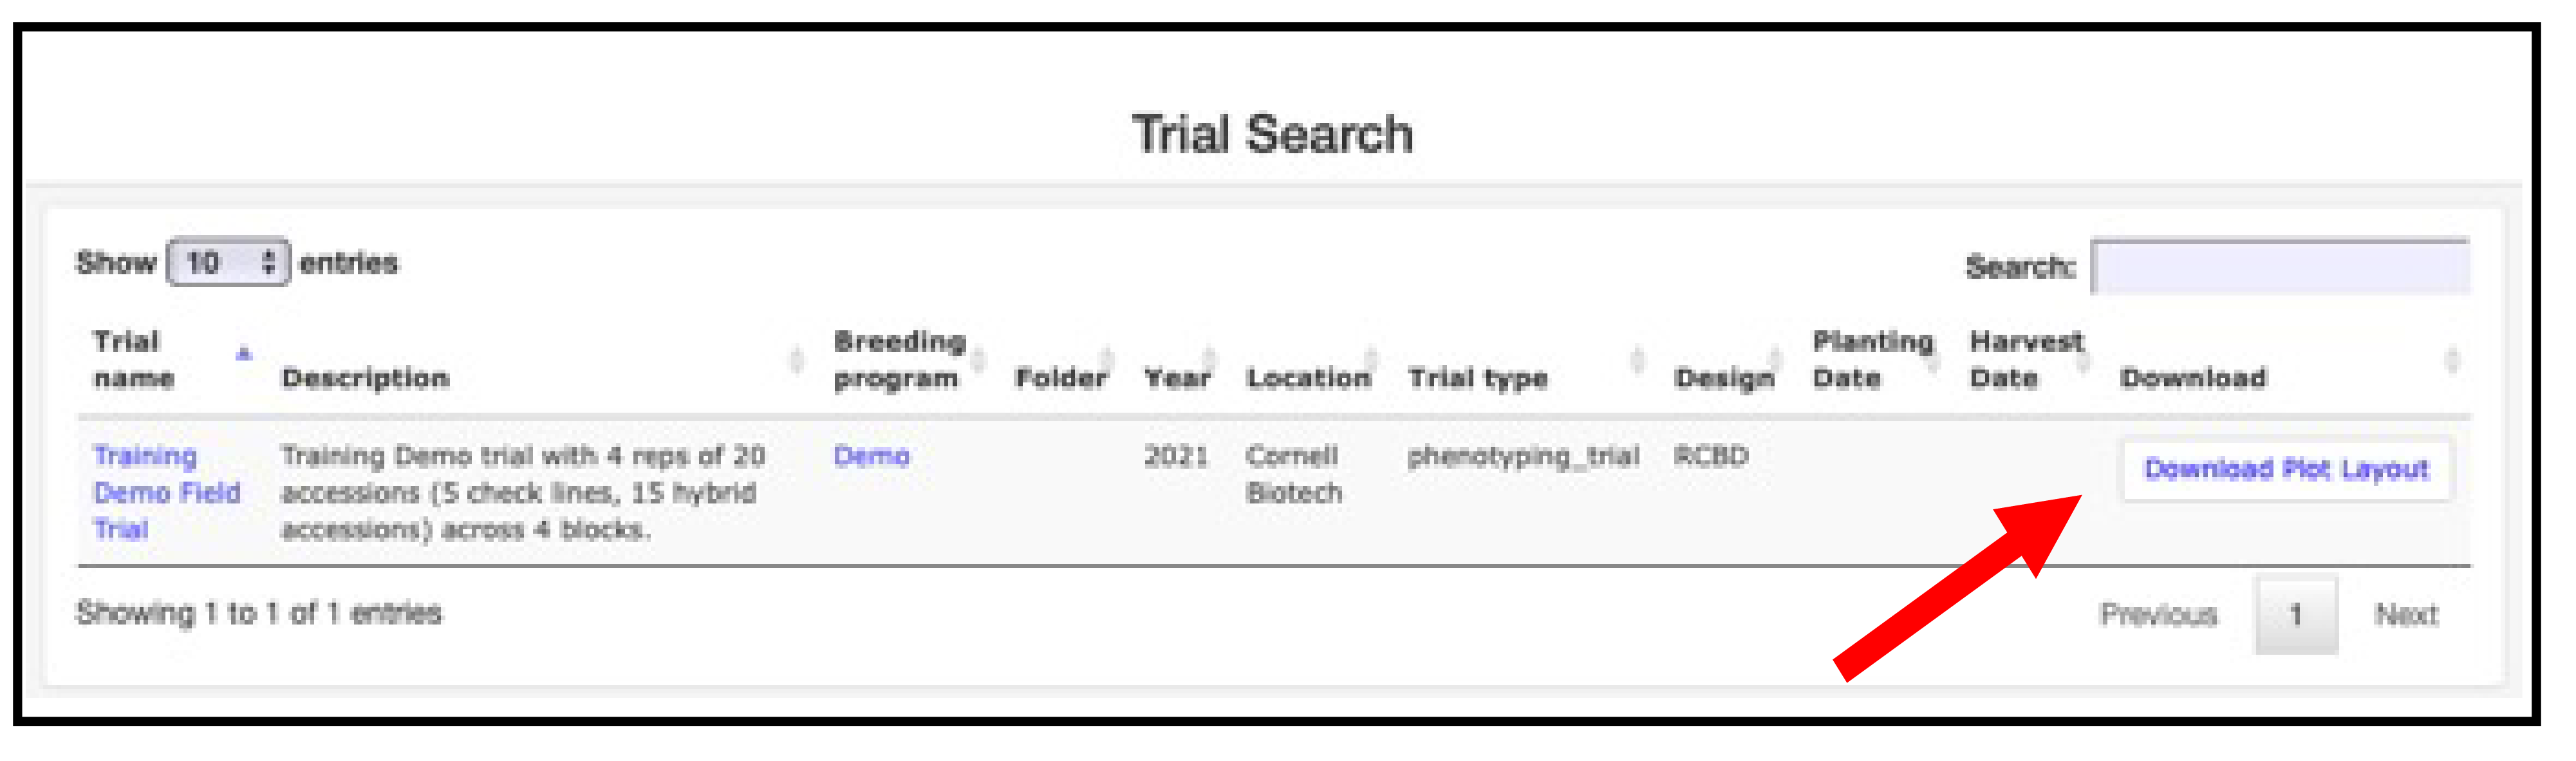
A .csv file should begin to download automatically.
Step 2. Select label information and print labels
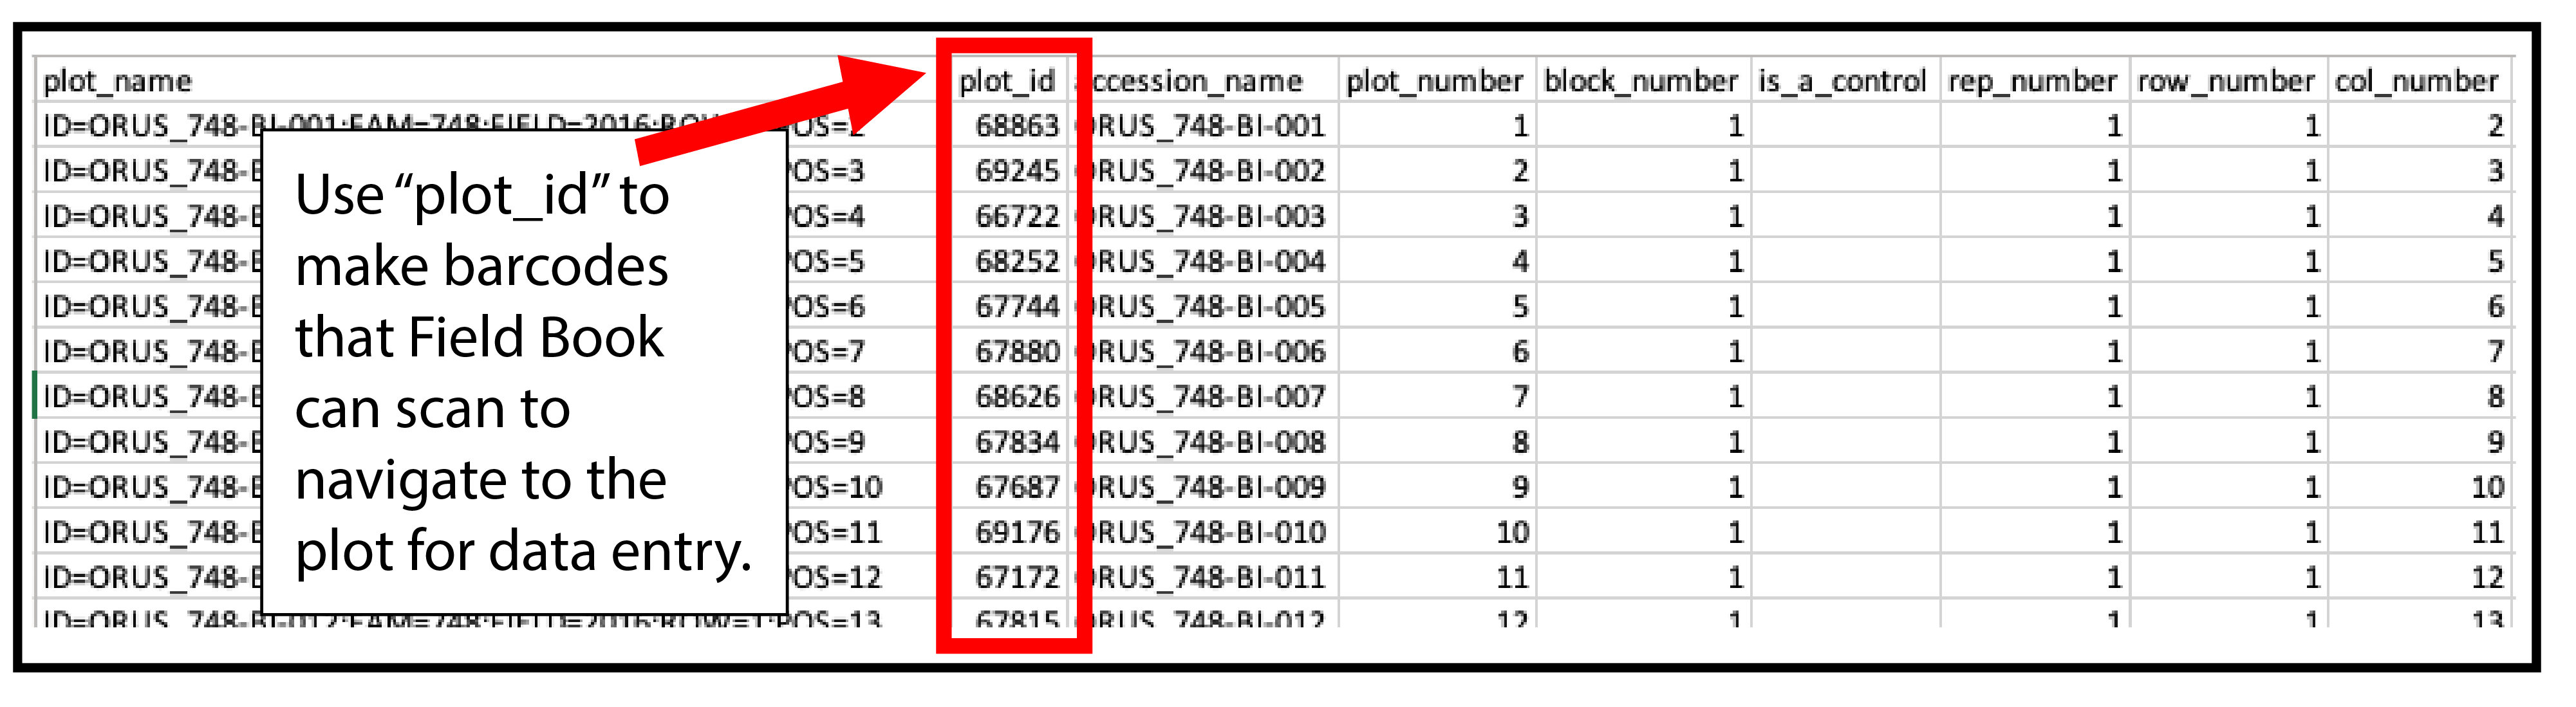
In the dowloaded .csv file, you will find information that you may choose to include on your labels: “plot_name”, “plot_id”, “accession_name”, “plot_number”, “block_number”, “is_a_control” (indicating if the plot is a control), “rep_number”, “row_number”, and “col_number”.
You’ll need to use “plot_id” (Fig. 2) to make barcodes that Field Book can scan to navigate to the plot for data entry.
3. Most breeding programs already have printers for label printing and other uses.
4. Use the unique 5-digit numbers from the “plot_id” column to generate barcodes, in addition to any other information from the .csv file that you wish to include on your labels, to generate labels using the label-printing software that comes with your printer.
5. Contact your BI coordinator if you need assistance with label printing.
About 1D (traditional) and 2D (QR) codes
Field Book can scan either 1D (traditional) barcodes or 2D (QR) barcodes using the camera on the Android device.
Most commercially-available software for designing labels will have the option to generate either 1D or 2D barcodes using any of the columns of information from your BreedBase “Plot Layout” .csv file.
Step 3. Place labels in the field.
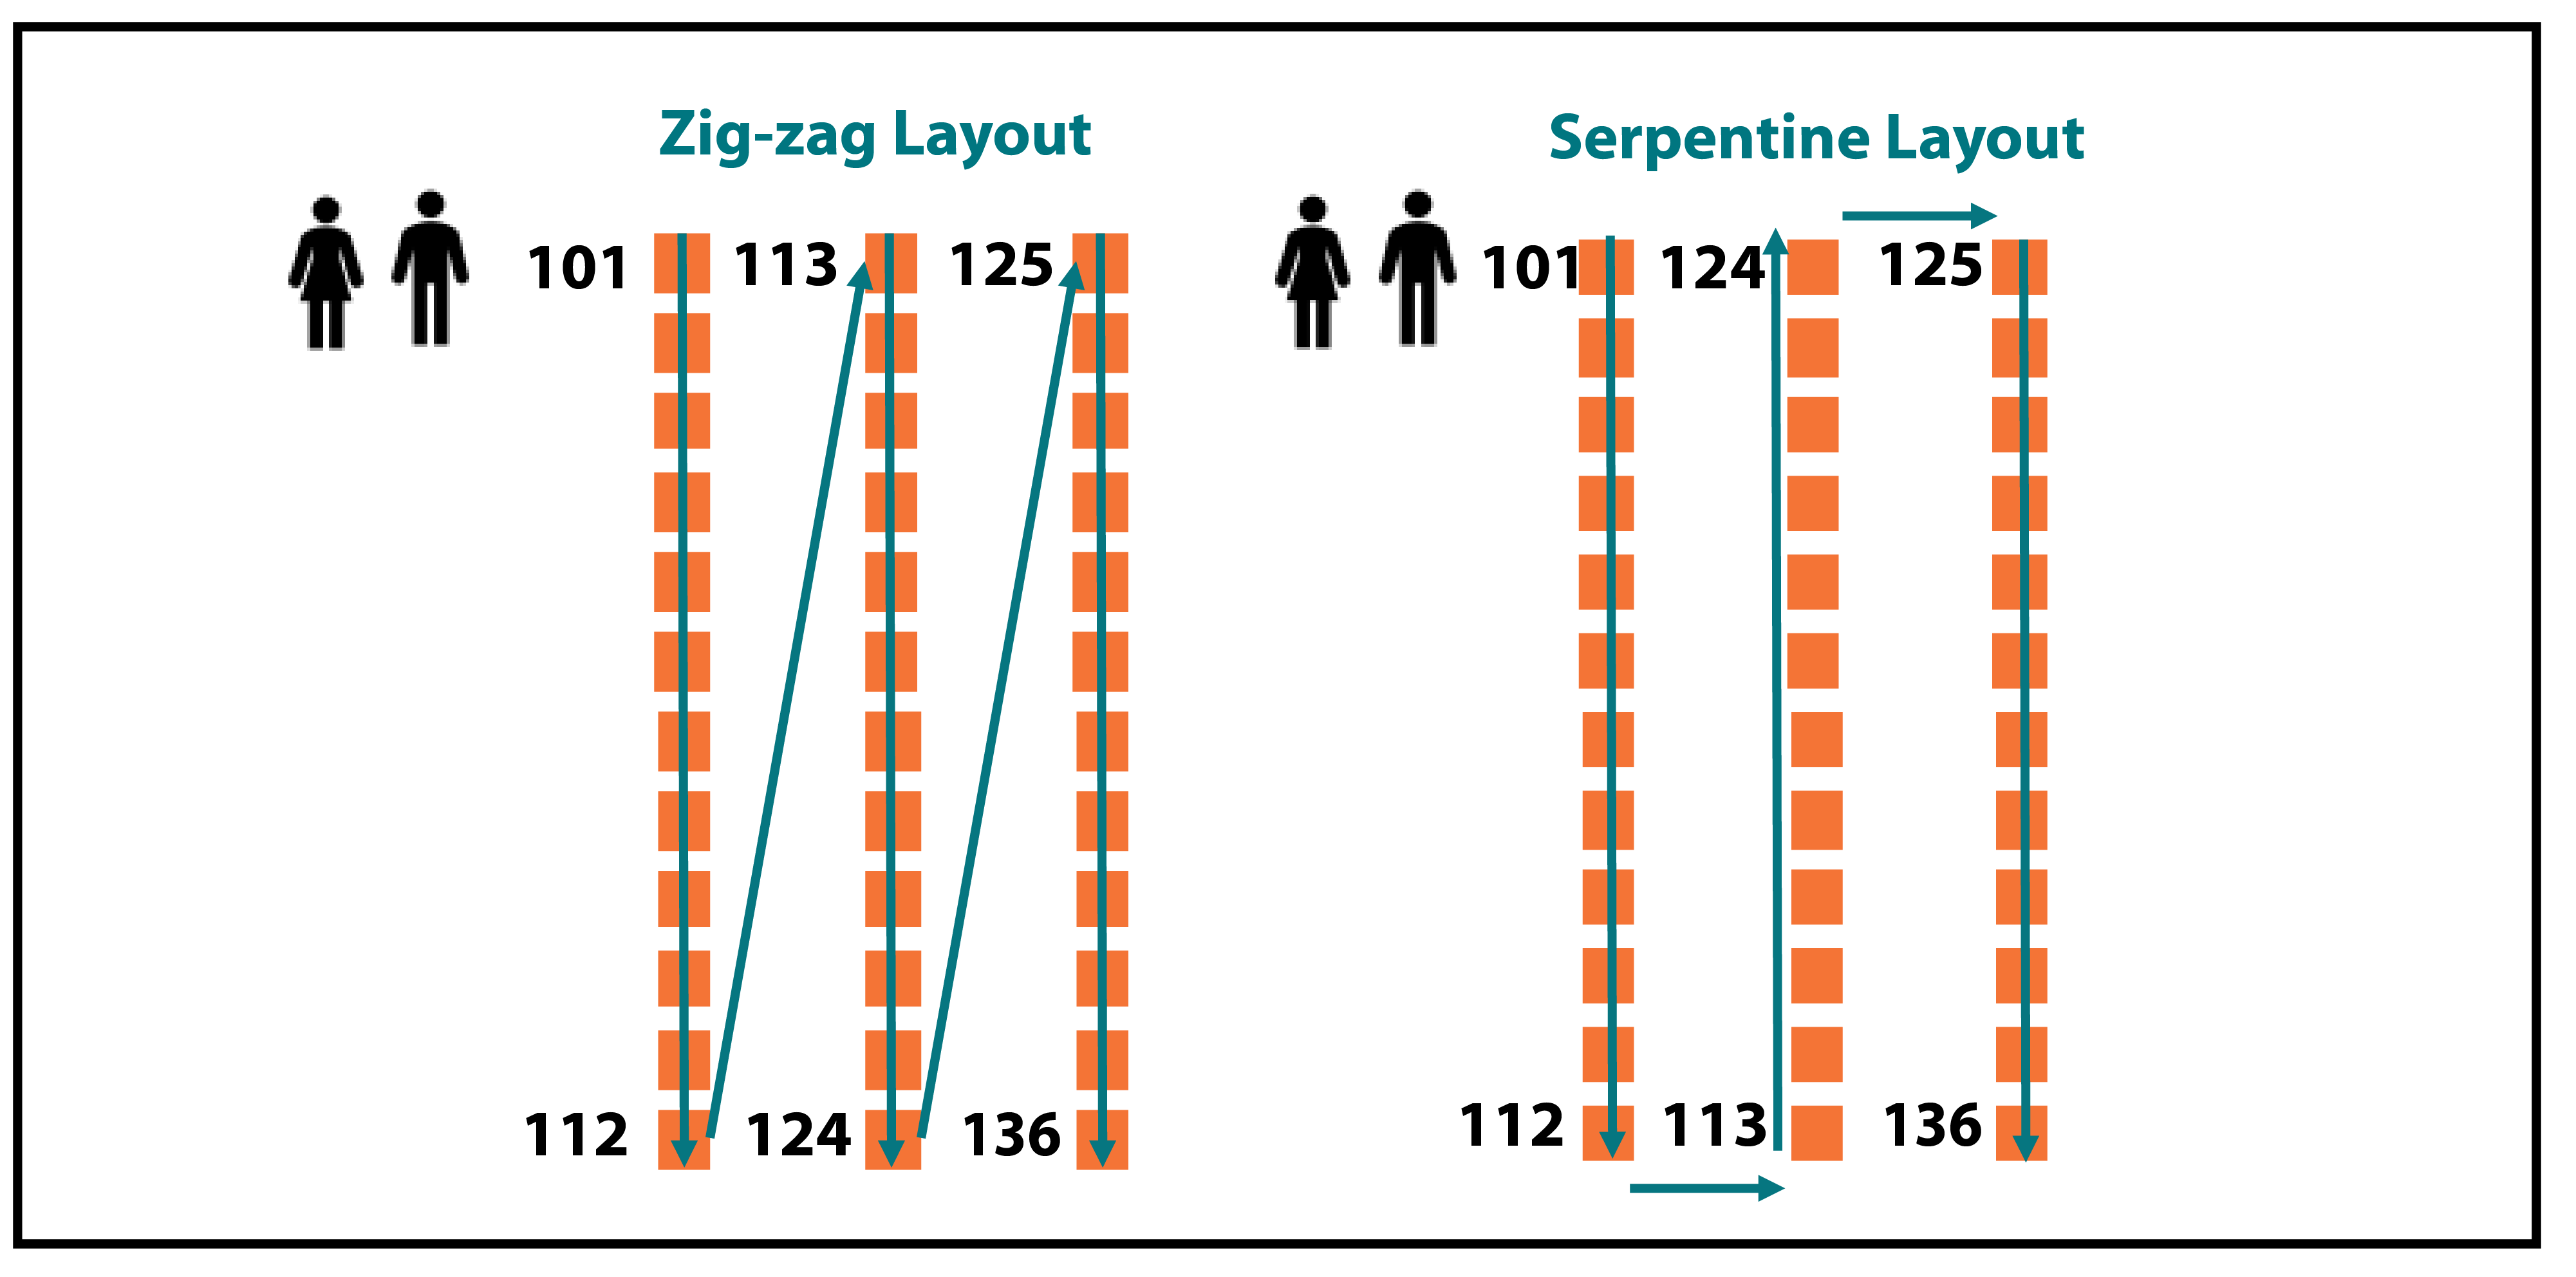
Recall that Field book advances to the next sequential plot based on plot number (120, 121, 122) independent of the X, Y coordinates or Row, Column numbering.
Your field navigation will depend on how you number your plots (Fig. 3).
Step 4. Configure Field Book to scan bar codes for plot navigation
Open Field Book on your device.
Select “Settings”.
Select “General”.
Ensure the box “Move to entry via barcode” is selected (Fig. 5, left).
Use the back arrows to return to the main menu.
Step 5. Navigate using bar codes in Field Book
Select “Collect” from the Field Book main menu.
There should be a bar code icon at the top of the screen (in the green bar).
Select the bar code icon to scan a bar code.
Field Book will read the bar code and navigate to that plot for data entry.
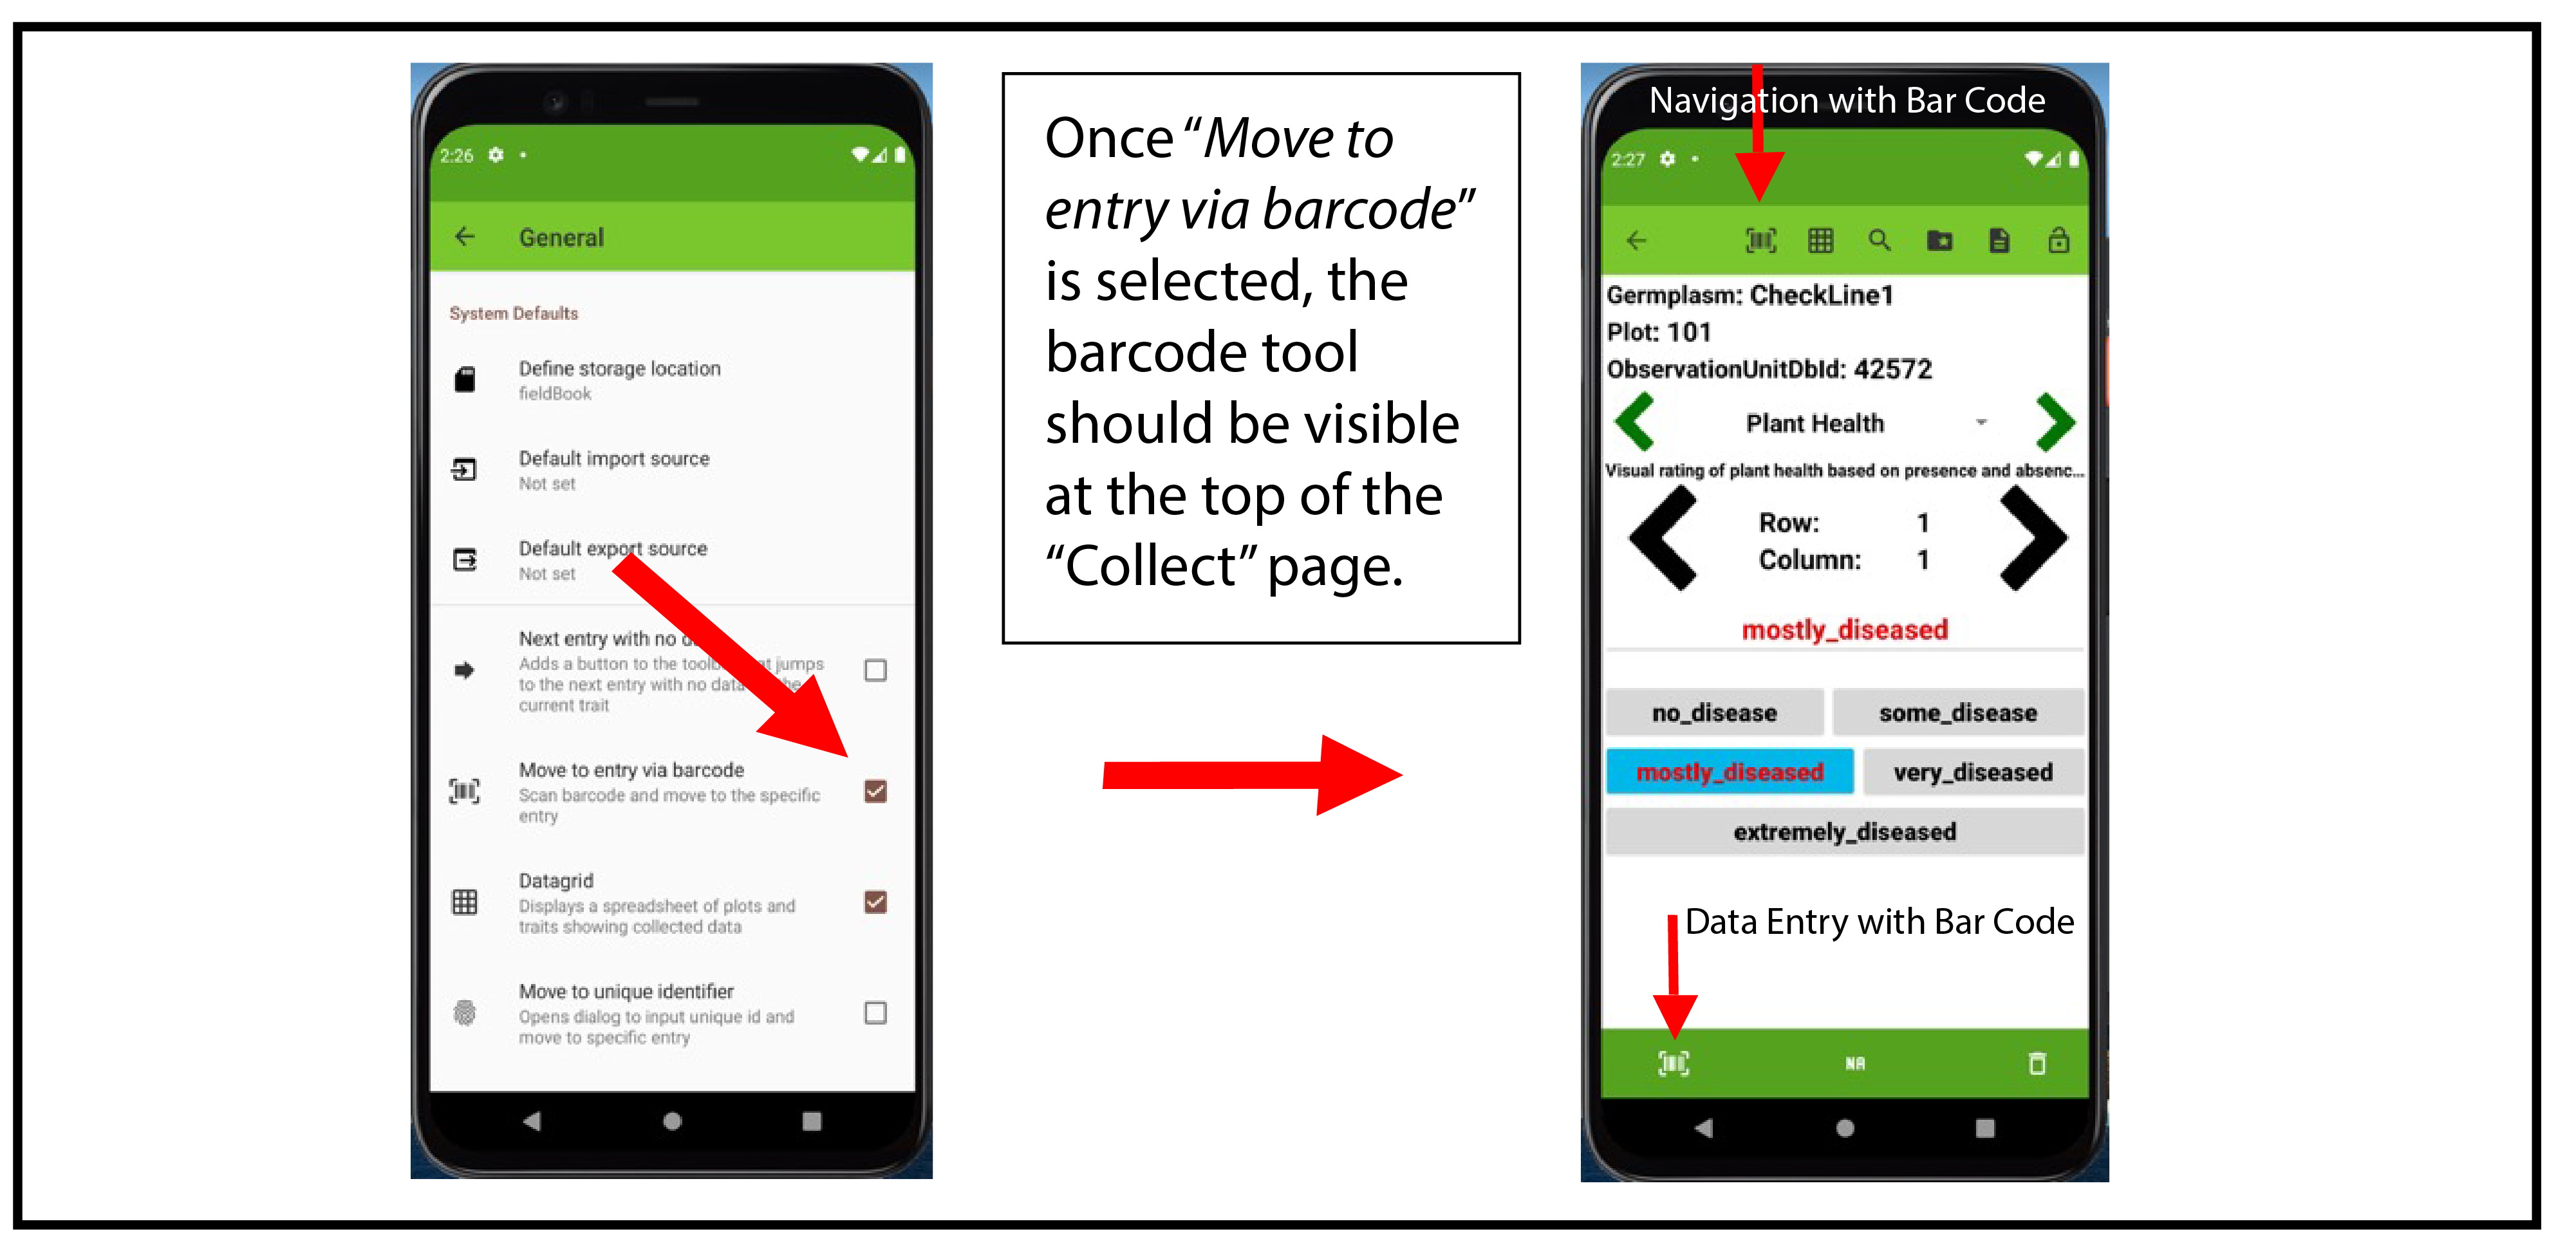
2 Barcode Icons: Which is which?
The top barcode icon is for plot navigation. The barcode icon at the top of the screen on the “Collect” page is for navigating to a plot, and only this purpose.
The bottom barcode icon is for entering data. There is a barcode icon at the bottom of the screen on the “Collect” page, but this icon is not for navigating to a plot. The bottom barcode icon is strictly for entering data using a barcode. Using this button will open the camera for scanning a barcode, but rather than navigating to a plot, Field Book will enter the information encoded in the barcode as the phenotypic data for the current trait that is queued up.
Success! You have completed this How-To module.
Related articles
Breeding Insight is funded by USDA at Cornell University. For more information, please visit http://www.breedinginsight.org.